

In the fast-paced world of email outreach, staying in control of who receives your messages is key to building trust and avoiding mishaps. That's where MailOptimal's Blacklist feature shines—a smart, user-friendly tool designed to give senders like you the power to exclude specific contacts from your campaigns effortlessly. Whether you're refining your prospect list or dodging accidental sends, this feature ensures your emails only reach the right people, every time.
What Is the Blacklist in MailOptimal—and How Does It Work?
The Blacklist Feature in MailOptimal is your personal "do not contact" shield. It's a simple yet powerful way to flag contacts you never want to email again—whether due to past bounces, or just a strategic choice. Once a contact is added to your Blacklist, MailOptimal automatically blocks any emails from being sent to them, no matter what.
Here's the magic: Even if you accidentally include a blacklisted recipient in a campaign and send messages (example- hey, it happens to the best of us!), the system steps in behind the scenes. It silently skips them, preventing the send and keeping your sender reputation spotless. No awkward follow-ups, no compliance headaches—just clean, intentional outreach. This feature is especially handy for sales teams, marketers, and anyone juggling large contact lists, as it promotes ethical emailing while saving you time and stress.
Think of it as a smart, silent safeguard: It respects your decisions and protects your outreach, all without extra clicks during campaign setup. Now, let's dive into the two straightforward ways to build your Blacklist—each tailored for different needs.
Way 1: Paste Emails and Domains—Quick and Targeted Exclusions
Need to block just a handful of people or patterns without the hassle of bulk uploads? The Paste Emails and Domains methods lets you copy and paste details directly into Blacklist box for instant protection. It's ideal for fast fixes—like removing someone who’s no longer a good fit.
This approach breaks down into two handy subcategories, making it flexible for various scenarios:
1. Add Email—Manual Precision for Individual Contacts
Sometimes, you just need to fix one specific email address. With Add Email, it's as easy as typing or pasting it in—one by one. For example, if "john.doe@unwanted.com" keeps popping up but doesn't align with your goals, add it here. MailOptimal will remember it forever (or until you remove it), ensuring future campaigns skip them automatically. No more manual scrubbing—pure peace of mind.
2. Domain—Block Entire Networks at Once
What if you want to steer clear of everyone from a certain email provider or company domain? Enter Domain blocking. Here, you simply enter the part after the "@" symbol—like "gmail.com" or "acme-corp.net"—and Done! All recipients from that domain join your Blacklist. This is a game-changer for avoiding low-engagement providers (think free email services that often lead to spam flags) or competitors' domains. Instead of hunting down individuals, one entry covers the whole group, streamlining your list hygiene.
Quick Tip: Whether you're adding emails or domains this method shines for its speed—just paste, save, and move on.
Way 2: Upload CSV File—Bulk Power for Larger Lists
Got a longer roster of contacts to exclude? Don't sweat the details—the Upload CSV File option handles bulk additions like a pro. This is your best choice when handling large groups at once—perfect if you're pulling contacts from spreadsheets, CRM tools, or old campaign data.
Here's how it flows: Prepare a simple CSV file with your recipients' emails, then upload it straight into MailOptimal. The system scans the list, adds every entry to your Blacklist, and confirms the count. From that moment, none of those contacts will receive your emails—accidental or not. It's especially useful for cleaning house after a big import or archiving old leads.
To make it error-free :
- Keep your CSV clean: Just email addresses, no extras.
- Double-check for duplicates
- Test with a small file first to see it in action.
Quick Tip: This method saves hours compared to manual entry, allowing you to focus on creating effective, high-impact campaigns instead.
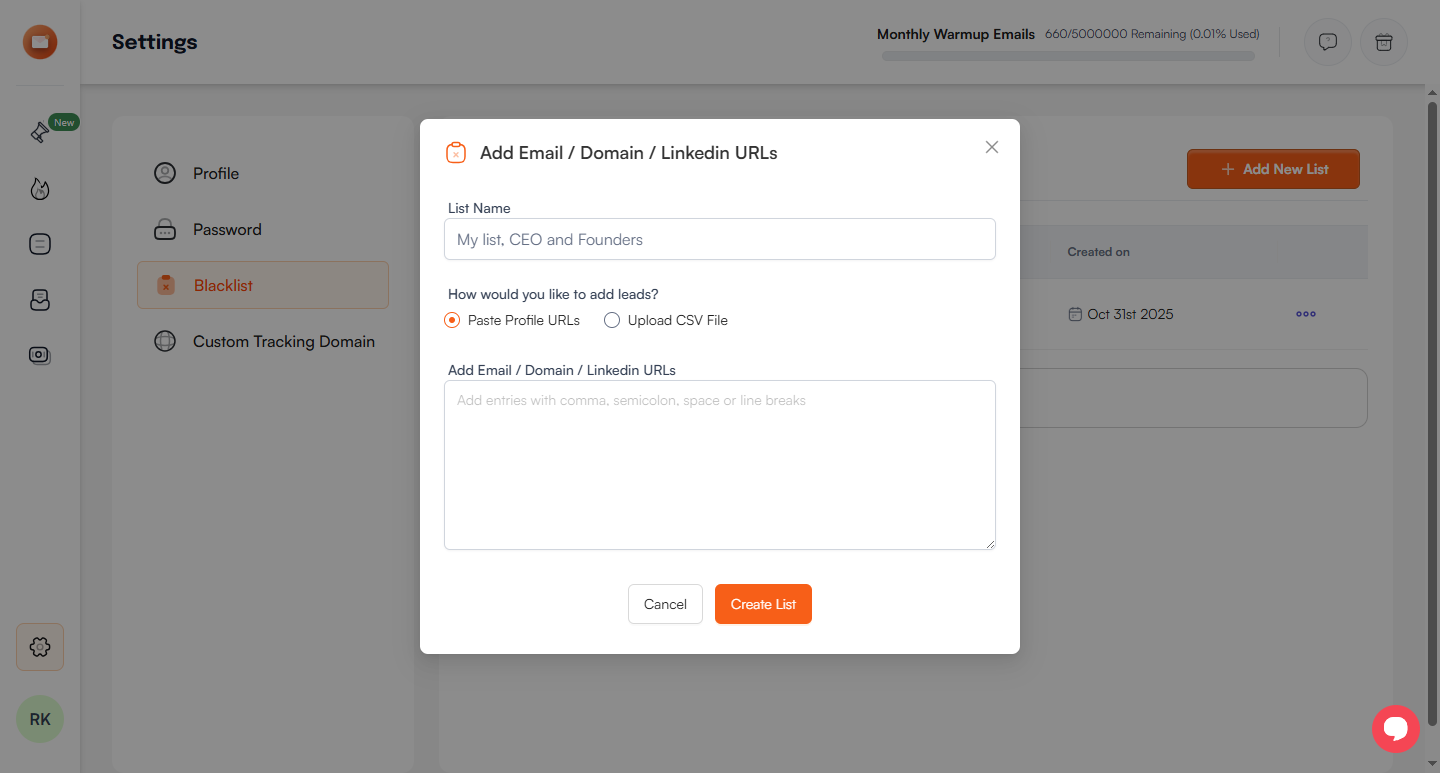
Step-by-Step: How to Add a Blacklist in MailOptimal
- Go to Settings in the left sidebar.
- Click on Blacklist from the menu.
- Click the “+ Add New List” button (top right).
- Enter a List Name (e.g., “Do Not Contact – Competitors”).
- Choose your preferred method — Paste Emails and Domains (for quick individual or domain blocks) or Upload CSV File (for bulk exclusions).
Why You Should Start Using MailOptimal's Blacklist Now
In a world where email deliverability can make or break your results, the Blacklist feature isn't just a nice-to-have—it's essential for smarter, safer sending. By letting you exclude contacts via Paste Emails and Domains (with its versatile sub-options) or CSV uploads, MailOptimal empowers you to create lists that truly convert. No more wasted sends, no more regrets—just targeted outreach that builds relationships.
Ready to get started? Simply log in to your MailOptimal dashboard, navigate to the Blacklist section, and begin adding exclusions with ease. This powerful feature—designed to streamline your workflow—works seamlessly with our full suite of tools to deliver a complete email management experience.